
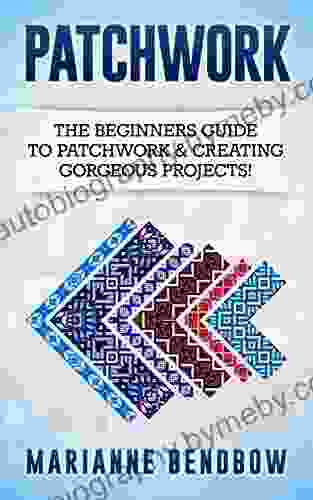
The Beginner's Guide to Patchwork: Creating Gorgeous Projects with Macrame and Quilting

Patchwork is a beautiful and versatile craft that can be used to create a wide variety of projects, from quilts and wall hangings to bags and clothing. In this beginner's guide, we'll teach you the basics of patchwork, including choosing fabrics, cutting fabric, and sewing your pieces together. We'll also provide instructions for two simple patchwork projects: a macrame wall hanging and a quilted pillow.
5 out of 5
| Language | : | English |
| File size | : | 3140 KB |
| Text-to-Speech | : | Enabled |
| Screen Reader | : | Supported |
| Enhanced typesetting | : | Enabled |
| Print length | : | 74 pages |
| Lending | : | Enabled |
Chapter 1: Choosing Fabrics
The first step in any patchwork project is choosing the fabrics you'll use. When selecting fabrics, there are a few things to keep in mind:
- The weight of the fabric: The weight of the fabric will determine how well it holds up to wear and tear. Heavier fabrics are more durable, but they can also be more difficult to work with. Lighter fabrics are easier to work with, but they may not be as durable.
- The texture of the fabric: The texture of the fabric will affect the look and feel of your project. Smooth fabrics create a more polished look, while textured fabrics add interest and dimension.
- The color of the fabric: The color of the fabric will determine the overall look of your project. When choosing colors, consider the other fabrics you'll be using and the overall style of your project.
Once you've considered these factors, you can start choosing fabrics. For your first patchwork project, we recommend using a variety of different fabrics in both light and dark colors. This will help you create a visually interesting project.
Chapter 2: Cutting Fabric
Once you've chosen your fabrics, you need to cut them into the desired shapes. The most common patchwork shapes are squares and rectangles, but you can also use other shapes, such as triangles, circles, and hexagons. The size of the shapes will depend on the size of your project.
To cut fabric, you will need a sharp pair of scissors and a rotary cutter. A rotary cutter is a tool that is designed specifically for cutting fabric. It is much faster and more accurate than scissors, and it can help you to achieve a clean, professional finish.
To cut fabric with a rotary cutter, place the fabric on a cutting mat. Align the ruler with the desired cutting line and hold it firmly in place. Hold the rotary cutter perpendicular to the fabric and slide it along the ruler. Be careful not to press too hard, as this can cause the fabric to tear.
Once you've cut all of the pieces for your project, you can start sewing them together.
Chapter 3: Sewing Your Pieces Together
There are a variety of different ways to sew patchwork pieces together. The most common method is to use a sewing machine. However, you can also sew patchwork pieces together by hand. If you are new to patchwork, we recommend using a sewing machine, as it is much faster and easier than sewing by hand.
To sew patchwork pieces together with a sewing machine, you will need a sewing machine, thread, and a needle. First, thread the sewing machine with the thread of your choice. Then, select a stitch setting that is appropriate for the fabric you are using. We recommend using a straight stitch or a zigzag stitch. Place the two pieces of fabric together, right sides facing, and sew along the desired seam line.
Once you've sewn all of the pieces together, your patchwork project is complete! You can now enjoy your beautiful new creation.
Project 1: Macrame Wall Hanging
This macrame wall hanging is a great way to add a touch of bohemian style to your home. It is also a relatively easy project to make, even for beginners.
To make this wall hanging, you will need the following materials:
- 1 yard of macrame cord
- A dowel rod
- Scissors
Instructions:
1. Cut the macrame cord into 12 pieces, each 12 feet long. 2. Fold the pieces of cord in half and tie them to the dowel rod, spacing them evenly apart. 3. Divide the cords into groups of four. Tie the cords in each group together using a square knot. 4. Continue tying square knots until you reach the desired length. 5. Trim the ends of the cords and hang your wall hanging on the wall.
Project 2: Quilted Pillow
This quilted pillow is a great way to add a touch of comfort and style to your home. It is also a relatively easy project to make, even for beginners.
To make this pillow, you will need the following materials:
- 1/2 yard of quilting cotton for the top
- 1/2 yard of quilting cotton for the back
- 1/2 yard of batting
- A sewing machine
- Thread
- A needle
Instructions:
1. Cut the quilting cotton for the top of the pillow into two 18-inch squares. 2. Cut the quilting cotton for the back of the pillow into one 18-inch square. 3. Cut the batting into an 18-inch square. 4. Place the two pieces of quilting cotton for the top of the pillow right sides together and sew around the edges, leaving a 4-inch opening. 5. Turn the pillowcase right side out and insert the batting. 6. Sew the opening closed. 7. Place the pillowcase and the piece of quilting cotton for the back of the pillow right sides together and sew around the edges, leaving a 4-inch opening. 8. Turn the pillowcase right side out and insert the pillow form. 9. Sew the opening closed.
Congratulations! You have now completed two beautiful patchwork projects. We hope you enjoy using this guide to create your own unique patchwork creations.
For more information on patchwork, please visit the following websites:
- The Spruce Crafts: What Is Patchwork Quilting?
- AllFreeQuilting: How to Start Patchwork Quilting
- Patchwork Posse: The Online Patchwork and Quilting Community
5 out of 5
| Language | : | English |
| File size | : | 3140 KB |
| Text-to-Speech | : | Enabled |
| Screen Reader | : | Supported |
| Enhanced typesetting | : | Enabled |
| Print length | : | 74 pages |
| Lending | : | Enabled |
Do you want to contribute by writing guest posts on this blog?
Please contact us and send us a resume of previous articles that you have written.
 Book
Book Novel
Novel Page
Page Chapter
 Text
Text Story
Story Genre
Genre Reader
 Library
 Paperback
 E-book
 Magazine
 Newspaper
 Paragraph
 Sentence
 Bookmark
 Shelf
Shelf Glossary
 Bibliography
 Foreword
 Preface
 Synopsis
 Annotation
 Footnote
 Manuscript
 Scroll
 Codex
Codex Tome
Tome Bestseller
 Classics
 Library card
 Narrative
 Biography
 Autobiography
 Memoir
 Reference
 Encyclopedia
 Amy Cuddy
 Andy Lake
 Amy Novesky
 Andrew Carnegie
 Dana Mccullough
 Ann Gimpel
 Amy Goldman Koss
 Stan Tatkin
 Angelo Tropea
 David Leiser
 Mike Farrell
 Jay Roeder
 Andy Saunders
 Andrew Lang
 Ana Sortun
 Robin Small
 Amy Ignatow
 Jeff Waldman
 Anette Henningson
 Jon R Lindsay
Light bulbAdvertise smarter! Our strategic ad space ensures maximum exposure. Reserve your spot today!


 Art MitchellFollow ·15.5k
 Colin FosterFollow ·19k
 Bradley DixonFollow ·13.5k
 Theodore MitchellFollow ·14k
- Jamison CoxFollow ·8.7k
 Steve CarterFollow ·9.3k
 Clayton HayesFollow ·14.7k
 Bruce SnyderFollow ·9.5k

 Bryce Foster
Celebrate the Luck of the Irish: Unveiling Saint...
As the verdant hues of spring brush...
 Chase Simmons
Cody Rodeo: A Photographic Journey into the Heart of the...
Step into the arena of the...

 David Mitchell
Unveiling the Enchanting World of Door County Quilts: A...
Step into the Heart of Amish Country in...

 Floyd Powell
Cowboy Chatter: Unraveling the Enigmatic Tales of the Old...
Step into the...
 Ismael Hayes
Unlock Content Marketing Mastery: How to Create...
In today's digital landscape, content is...

 Boris Pasternak
More Than 200 Hardball Questions For The Thinking Fan
The Ultimate Baseball Trivia Challenge Are...
5 out of 5
| Language | : | English |
| File size | : | 3140 KB |
| Text-to-Speech | : | Enabled |
| Screen Reader | : | Supported |
| Enhanced typesetting | : | Enabled |
| Print length | : | 74 pages |
| Lending | : | Enabled |
